Jump to content

My biggest plug so far


amateurplug
 Share

Recommended Posts

Hello! How are you? A few days ago i designed and printed my biggest plug up to date. I ussually wear my second biggest plug for one or two hours before inserting this one. But i can handle it just for an hour or so. My goal is to keep it inside for more time, do house tasks, sleep, gym and the normal things i would ussually do.

Here is the plug i use for prepare my butt (i ussually sleep with it also):

cuIQVyy.jpg?1

This one is  7.2 cm Ø at the widest part and 5.2 cm Ø at the smallest part. Airpods for comparison.

This is me wearing it, as a link for reasons: https://i.imgur.com/nRDe1HP.jpg


There is the new plug:

4lIFixq.jpg

7,7 cm Ø at thickest part and 6,7 cm Ø at the small part.

And this is a short video of me removing it: https://i.imgur.com/Atrsp9n.mp4


I have an account in cults3D for downloading the files, but i can send them for any member of this forum for free,. Just ask me.

Of course i did a LOT of stress test on all my prints before inserting them. I actually printed some plugs just to destroy them and i can assure they are very very difficoult to break, even with warmer temperatures.

So, what do you whink? I realy apreciate your comments. I am looking for someone who can cover my toys with silicone. I would send them and pay for it of course. Also, if someone is into metal modeling, i am also interested.

As i posted some photos of mine, i dont know if the best place to post this is on General or in Photos. So i will leave it here, the mods are free to move it :D


Have a nice day!

Link to comment
Share on other sites

1 hour ago, imsnowman72 said:

Very interesting! What material are you using to print?  Thanks for sharing.

PLA, its enough for the use. I was thinking about ABS but its pretty difficult to print with :D

Link to comment
Share on other sites

9 hours ago, yesplease said:

very cool!   is it a rigid material or does it have some pliability? 

Its very rigid. There is some flexible materials, but i can print only with one material at time. I usually use a Tenga egg to cover the base and a condom wich covers the tenga egg and the plug at the same time. I would try to pour some silicone on it but i cant do it now

Link to comment
Share on other sites

PLA? That doesn't sound very comfortable. Although I know there are plenty of rigid metal and glass toys out there, as well as firmer rubber/plastic toys, at this size range I would want something with a little more flexibility. TPU is obviously much more of a challenge to print with but it can do what PLA/ABS/PETG cannot in terms of flex. I printed a couple of plugs with some 95A Shore hardness TPU and had to drop infill down to 5% (with three or four walls) to have the right balance of strength and squish...I also upped the infill in the neck/base to 50% so it would hold up to being sat upon. Going to 10% infill in the main body was a little on the firm side but still doable. My next goal is to print with Ninjaflex, maybe up around 20-25% infill, and see how a very soft TPU compares to what I used previously.

The other concern with PLA is that it will be hard to keep clean. The condom is nice, but if there's anywhere on there that might touch fluids that the condom and egg don't cover, you will have a hard time with properly cleaning - you can't boil it or put it in a dishwasher because PLA has such poor temperature resistance. ABS and PC have far superior temperature resistance but you'll almost certainly need an enclosure to keep them from warping and cracking during printing; PETG is easier to print with but shouldn't be boiled (a dishwasher or chemical sanitization means would be fine).

Although I haven't used it yet, I got a silicone that checks all the boxes: it's designed to be brushed on so it's not too runny, it's got good temperature resistance, and it's a platinum-catalyzed resin that should be body-safe. Not sure if you'll have access to it in Spain but here's the Amazon link anyway just in case: https://www.amazon.com/gp/product/B00EFEK8BS.

Link to comment
Share on other sites

@RectalSonar thank you for the response! I had no opportunity to try flexible materials, but that sounds very good. I find it pretty confortable, but i am shure that it would be more confortable with a silicone layer around it. But like you said, its difficult to reach some good quality silicone here.

Maybe i am not explaining myself very good, english is not my native language. In another moment i will upload a picture of the plug covered. After some years doing the condom and tenga egg thing, never had an uncovered area. But again, im with you, pouring silicone on it would be the perfect cover.

can you show some of your plugs, slicer, etc?

Have a nice day!

Link to comment
Share on other sites

I may also have read your post too quickly in my excitement for 3D printing...with the egg covering it, that certainly would mitigate the hardness of the PLA.

I'm using Cura, as when I first started getting into 3D printing I ended up watching a lot of CHEP videos and that guy pretty much exclusively works in Cura. The profile I got is from a different channel, Technivorous, and I think I made a few tweaks here and there:

QVCxrjB.png


J5x84oY.png


rIufqJY.png


27VsBUY.png


dryaGVf.png


The plugs (and a stretching cone I forgot to mention) were all done in Hatchbox green TPU. The cone I think I did with 10% infill to give it a little rigidity but the plugs are as I said above, with variable infill at 50% in the neck/base and 5% in the body. When I sliced the plugs I didn't know the proper trick for variable infill settings (use a support blocker to cover the desired area, select the blocker, go to Per Model Settings, set mesh type as Modify Settings for Overlaps, then delete the pre-selected settings in favor of Infill Density) and ended up using Tinkercad to split the neck/base and the body into two separate files which I then stacked on top of one another in Cura and used Per Model Settings to adjust infill accordingly. I still need to give them the silicone covering treatment but some initial tests with very vigorous cleaning afterward have been pleasant.

Link to comment
Share on other sites

I don't recall how long the cone took off the top of my head but it was probably somewhere around 14 hours to print, with the plugs probably being closer to 10-12 hours. The material cost was quite reasonable, I think an entire 1-kg spool of filament was around US$30 and I printed plenty more experiments and non-toy items with the 2/3 of the spool that I used before trading it to someone for a couple of specialty filaments for other projects. Best guess is that all three of those represent maybe $7-10 worth of plastic, if I don't count the cost of testing different infills and a few failures.

The printers themselves can really vary in price. If you're going to go the route of printing in a hard plastic and then covering it with something else that is much softer, the cheapest printer I can think of that is still remotely decent would be the Monoprice Mini Delta at US$170ish. The printer I used for these items is a Creality Ender 3, which I got off of eBay with a spool of filament for $209 (it can be had for as little as $180 if you're bargain hunting, or even less if you go with a refurbished/used model). I also recently got a much larger Artillery Sidewinder X1 for $359 on an insane deal from GearBest (admittedly not the most reputable vendor when it comes to customer service, though I may have been lucky and only had a problem with the order during shipping). While the Sidewinder should be able to print soft materials right out of the box (which I haven't had time to test yet), I did have to install some modifications on the Ender 3 because the stock design isn't necessarily suited to printing with flexible materials...that mod was roughly $60 but some people have been successful with free designs they print themselves. The Ender 3 is one of the most popular consumer-grade printers out there, only rivaled by the Prusa i3 (a kit version of which is probably in the US$750 range), and has a ton of community support. If you had money to burn, there are consumer/business-grade printers that go up into the multiple thousands of dollars range that add more features and capabilities; for example, if I won the lottery I'd buy a Raise3D E2 with dual extruders and an enclosure.

Link to comment
Share on other sites

@imsnowman72 as @RectalSonar said above, its pretty cheap. I also have the Ender 3 with enclosure for ABS and Micro Swiss hot, so its capable of printing flexible materials. If anyone is interested in designs or prints, message me


have a nice day!

Link to comment
Share on other sites

8 hours ago, amateurplug said:

@imsnowman72 as @RectalSonar said above, its pretty cheap. I also have the Ender 3 with enclosure for ABS and Micro Swiss hot, so its capable of printing flexible materials. If anyone is interested in designs or prints, message me


have a nice day!

An all-metal hot end shouldn't be necessary for flexibles (Ninjaflex I know says to please not ever exceed 230˚C on the nozzle because the thermal breakdown products are nasty) but I got it to be able to print PETG without having to service the PTFE tube every other day...and yes, the Micro-Swiss hot end (and at least the Gulfcoast Robotics clone) is a great design that is easy to install.


37 minutes ago, imsnowman72 said:

Wow. Great response RectalSonar.  Thanks you.

You're welcome! It's a fun hobby all on its own, and if you're a little technically minded and on a budget you can destroy your ass without destroying your budget. :)

Link to comment
Share on other sites

Update - after kind of giving up on trying to print Ninjaflex on my Ender 3 (even a simple calibration cube ended up with filament coming out between the gears of the extruder instead of through the nozzle), I threw up a Hail Mary and put it into my Sidewinder. And the results were nothing short of wonderful. The temperature tower I found for TPU still looks like trash due to all of the gaps and retractions but the flexible octopus printed shockingly well and then I did this:

lPdlKXy.jpg?1

17 hours or so of total print time, with 50% infill again in the neck/base and 10% in the body. Three walls didn't seem entirely enough to cover up the infill pattern, but that's a minor concern. The very tip also had a small hole, probably because the filament stuck to the nozzle a bit or because the infill left no support for the very top...I have sliced another version in the same size but with a small section of 100% infill at the very tip to prevent that from happening. I won't print that yet unless I have problems with the coating I put on:

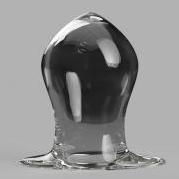
1oQWX5k.jpg?1

I ended up not brushing anything, I just mixed up the silicone and dumped it on top. I probably used way too much, given the puddle that formed around the base, but wasn't sure how thick it would be nor how well it would adhere to the overhangs. After a little processing, this is what it looks like:

rNVzEhP.jpg?1

Not the most alluring combination of colors, but it is what it is. Applying the silicone only by way of gravity helped it be incredibly smooth, though I wonder if additional coats might not be a good idea. If this one fails in some way, I have that replacement sliced and ready to go plus plenty more silicone. When I get a chance to use it, I'll report back with how it turns out.

Link to comment
Share on other sites

@RectalSonar wow! That looks nice! So you just poured the silicone on it and thats it? Wich thickness is the silicone cover? Man i really want to do that to my plugs.

There is a chance of you doing some video of the plug? Maybe of the pouring itself.

Link to comment
Share on other sites

3 hours ago, amateurplug said:

@RectalSonar wow! That looks nice! So you just poured the silicone on it and thats it? Wich thickness is the silicone cover? Man i really want to do that to my plugs.

There is a chance of you doing some video of the plug? Maybe of the pouring itself.

Yep, that's about it. I used the stuff from the link several posts back, which is a two-part resin each with a similar (very thick) consistency for both parts. Because I wasn't sure how much it would stick to things, I put a disposable zip-top bag into a cup, poured in what apparently was equal portions from each bottle (it's hard to measure because of how thick it is), stirred the two parts together with a broken half of a bamboo skewer, and poured it over the top of the plug. I didn't take a video (my hands were busy with the cup and the skewer to help scrape as much as I could get out of the cup) but it's pretty simple - try to pour directly onto the tip and make sure it flows evenly down all sides. I used the skewers to help make sure it got onto the overhang parts, and to try to keep the puddle from going off the edge of the glass. I didn't take any measurements either before or after pouring but I suppose I could try to at least get a measurement around the fattest part of the plug to see how much thickness I got in that exact spot. My guess is that it's pretty thin at the top where the color of the Ninjaflex shows through, and that it will be far thicker at the base than it is at the top.

For what it's worth, I did all of this on the smooth side of my glass build plate for the one printer. Again, not knowing how well the silicone would bond to things, I used a little purple glue stick as a barrier; although I ended up not coating enough of the glass with glue stick to account for how the silicone puddled next to the plug, it came off pretty well on its own...a few bits here and there were left behind but a wet paper towel to remove the remaining glue stick and the part scraper that came with the one printer were sufficient to get the glass completely clean.

And I was able to play with it a bit in the shower today. What I learned is that the silicone coating is super smooth, it did a phenomenal job at covering up the layer lines even with the thinner bit towards the top. However, I don't think 10% infill was sufficient - it deformed enough that it just squished when I sat on it. Granted, it's been a while since I've been able to get a good stretch going and I may give it another go with a little more warm-up, but I think the Mk2 version of this experiment will involve 15-20% infill and raising the area of dense infill from just the start of the neck and down into the base, up to maybe halfway between the top of the neck and the widest point. I don't want to take the dense infill much higher than that because then it's not going to be as comfortable, but I also don't want the plug to just crumple rather than going in smoothly. Perhaps I'll leave the 50% infill section through the top of the neck alone, go 35% from the neck to halfway to the widest section, and then 20% from there until dialing it up to 100% at the very tip (for support purposes).

I'll probably also try out the second plug before I cover it, because I maybe used a third of the silicone on this first attempt. It says it has a limited shelf life and I don't want to buy a whole second kit for only one use...some of the other files I've found (mostly in the Naughty section of Cults3D.com) have some unfortunate overhangs and/or gaps that will be a challenge to print in a flexible filament.

Link to comment
Share on other sites

So, update: after some more practice with getting my hole back into shape, I did successfully get all the way in with my printed plug. On reflection, I think I did get the infill percentage correct for this size and shape but if I do print another plug I will go ahead with the more gradual infill change above the neck. Next on the docket, however (after a bunch of other non-sexual projects I have in the pipeline are done), would be either a different plug shape - perhaps something for longer-term wear - or a dildo of some kind. I'll have to do some more experimenting with overhangs and supports (flexible filaments don't usually play well with supports, at least in my experience) but I would call everything so far a success.

On 8/21/2020 at 6:27 PM, imsnowman72 said:

Y'all doing the build-your-own are very creative.


That's very kind of you! I don't know that I can really lay claim to "creative"...I'm just taking an existing design and fiddling with various parameters in a rigorous and planned manner. More like putting a puzzle together than creating one. :) That's why I like 3D printing so much; I never was much good at art and didn't have much better success with using hand tools, but having a design already made and figuring out how to make it without doing any of the direct, physical work allows me to do some really neat things. Case in point: I've tasked my printer right now with making all of the pieces to build a replica of Han Solo's DL-44 blaster from Star Wars. I could never make something like that from raw blocks of wood or plastic, never mind painting the end result, but I can print pieces in five different colors (including one with real wood fibers as a filler), assemble most of them with friction fits and a few with super glue, and end up with the same result.

Link to comment
Share on other sites

I'm with imsnowman, y'all need to take a bow! This is cool as hell and creative. I'd have never thought to 3D print some plugs and I have learned more about the whole process while reading this thread. I look forward to more updates and again, bravo!

Link to comment
Share on other sites

 Share

×
×
  • Create New...

Important Information

Terms of Use Privacy Policy We have placed cookies on your device to help make this website better. You can adjust your cookie settings, otherwise we'll assume you're okay to continue.